A]. Deploy Wordpress website using SPanel Wordpress Manager.
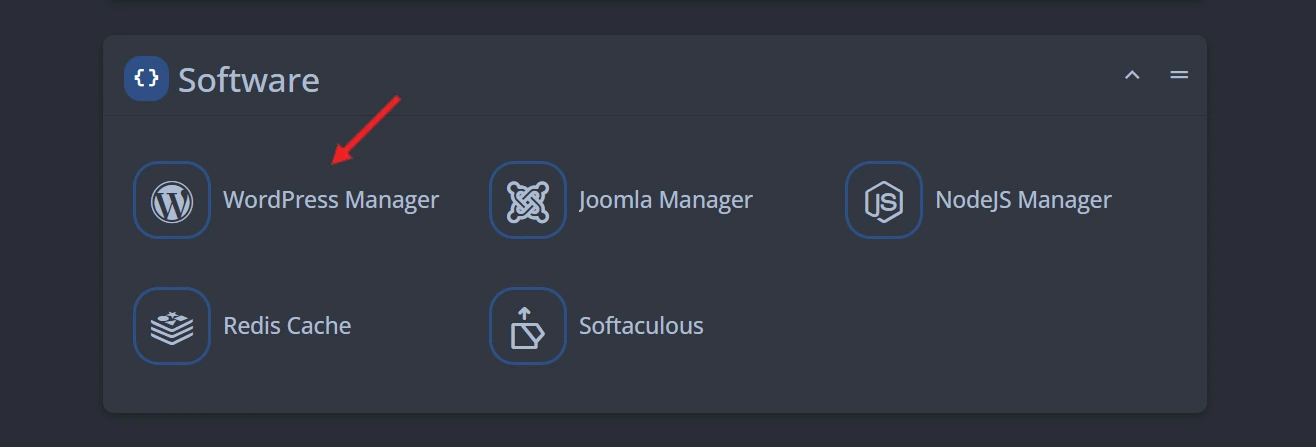
1. Login to your SPanel account. Click on "Wordpress Manager" under "Software" section.
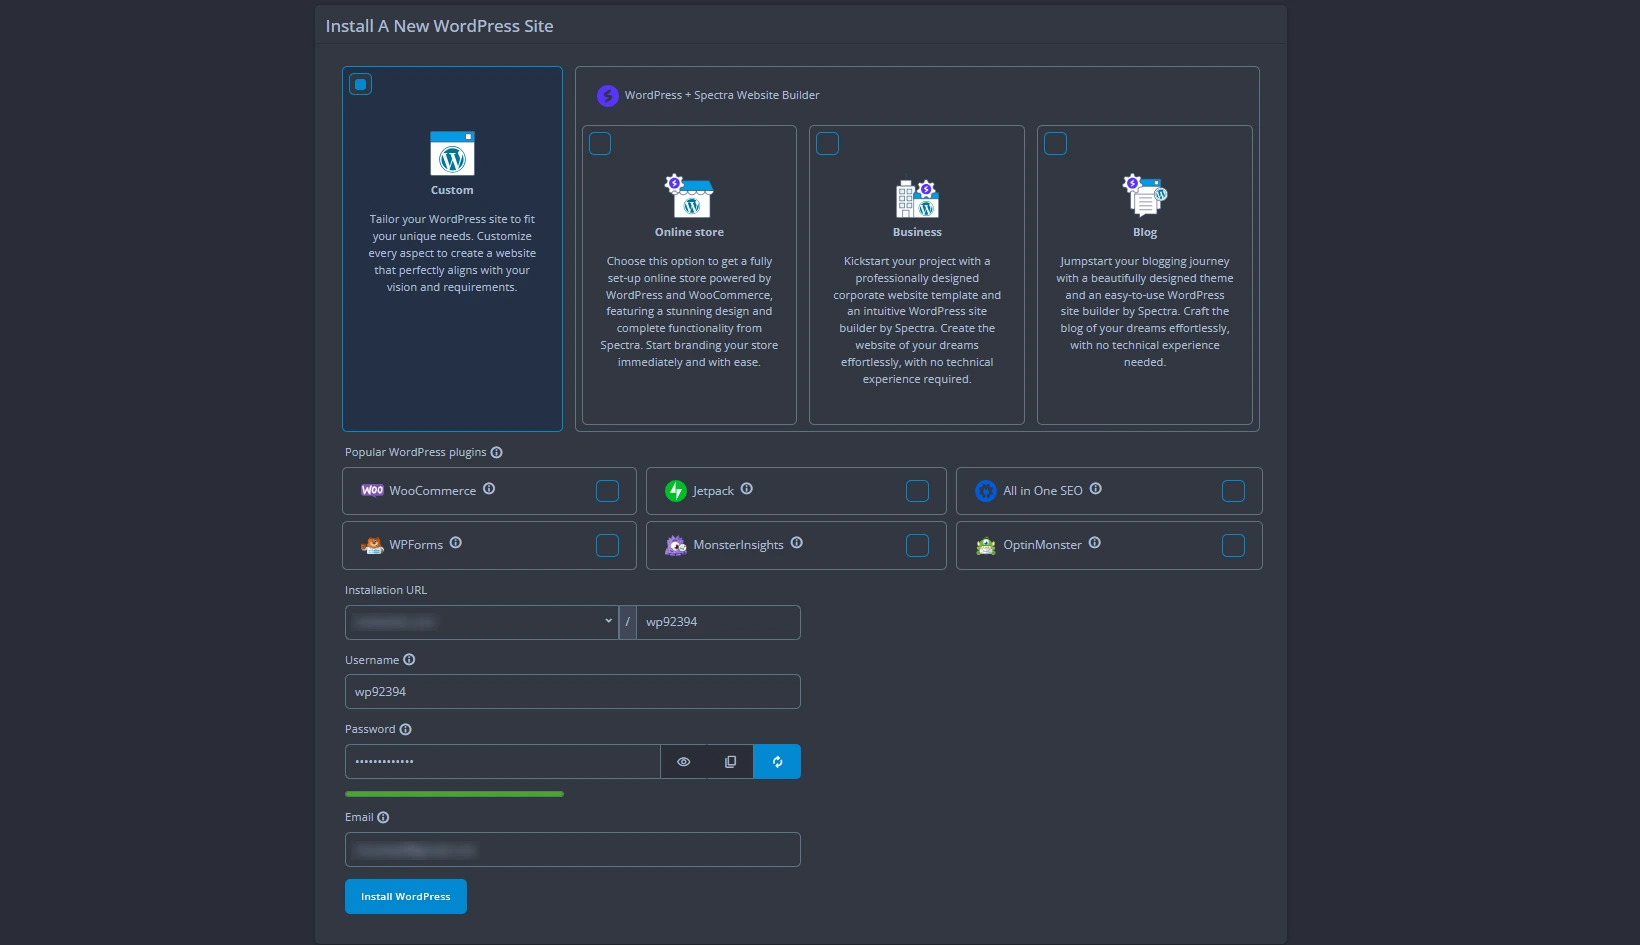
2. Click on "Install a New Wordpress Site" button. Choose custom installation option to manually select plugins and configure every aspect, or choose a predefined template (Online Store, Business, or Blog) for a ready-made setup with essential features automatically included.
For the installation URL, if you want your website address to be https://yourdomain.com/, leave the field after the “/” empty or remove the existing "wp92394"; if you keep “wp92394”, your website will be at https://yourdomain.com/wp92394 instead.
Enter the username, password and email address for the Wordpress admin dashboard. Click on "Install Wordpress" button.
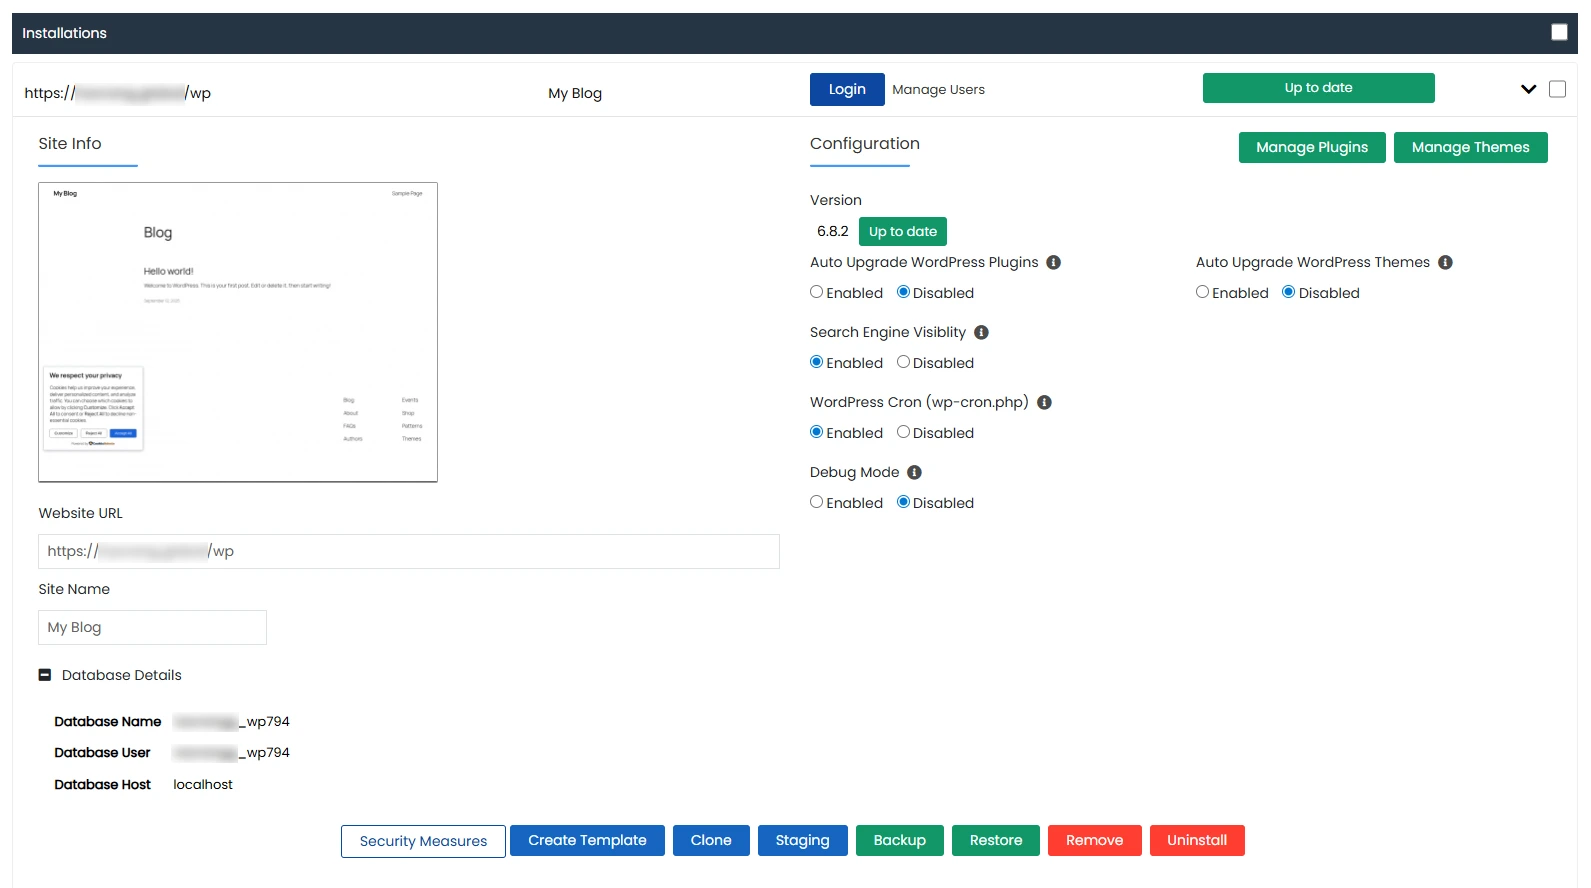
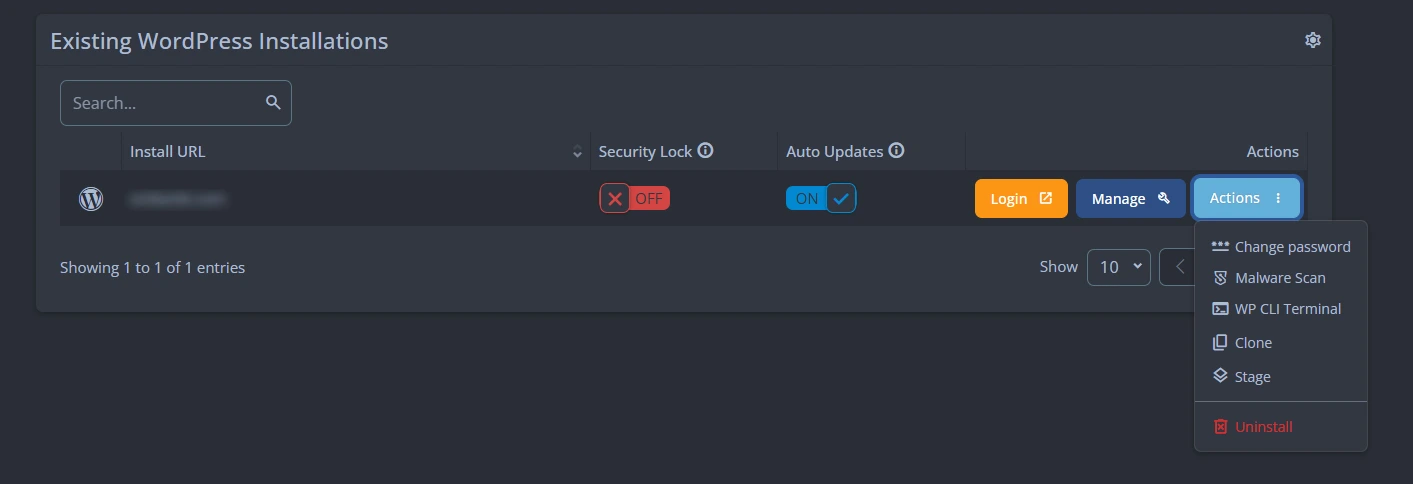
3. The Wordpress Website will be created and appear under Existing Wordpress Installations with a bunch of options. You can use the "Login" button to access the wordpress website admin dashboard. Incase due to some error you cannot login or are lazy to login to wordpress admin dashboard, you can use "Manage" option from here itself to control the installations of plugins, Wordpress users management, Maintenance mode etc.
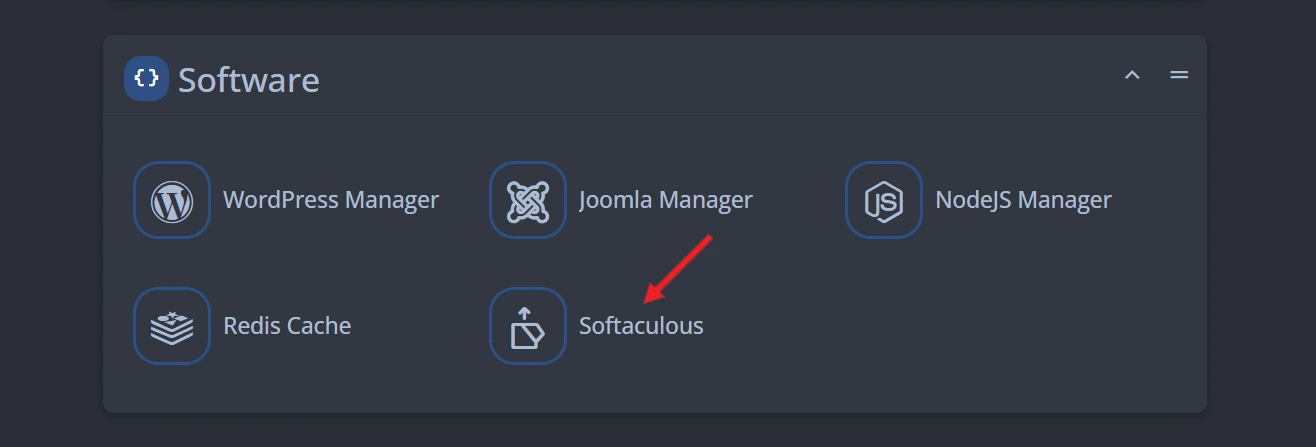
B]. Deploy Wordpress website using Softaculous.
1. Login to your SPanel account. Click on "Softaculous" under "Software" section. You will be redirected to Softaculous dashboard.
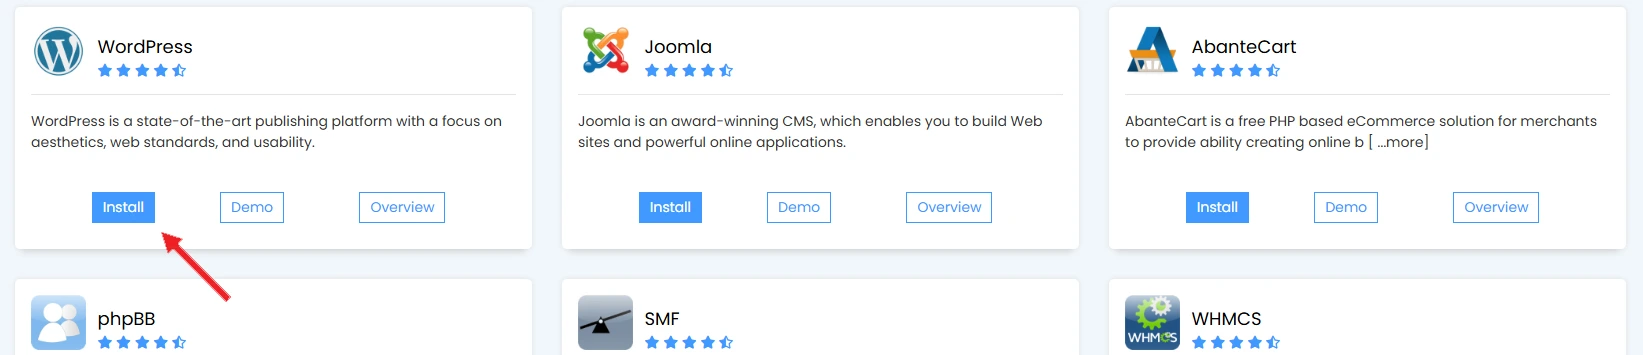
2. Click on "Install" button under Wordpress.
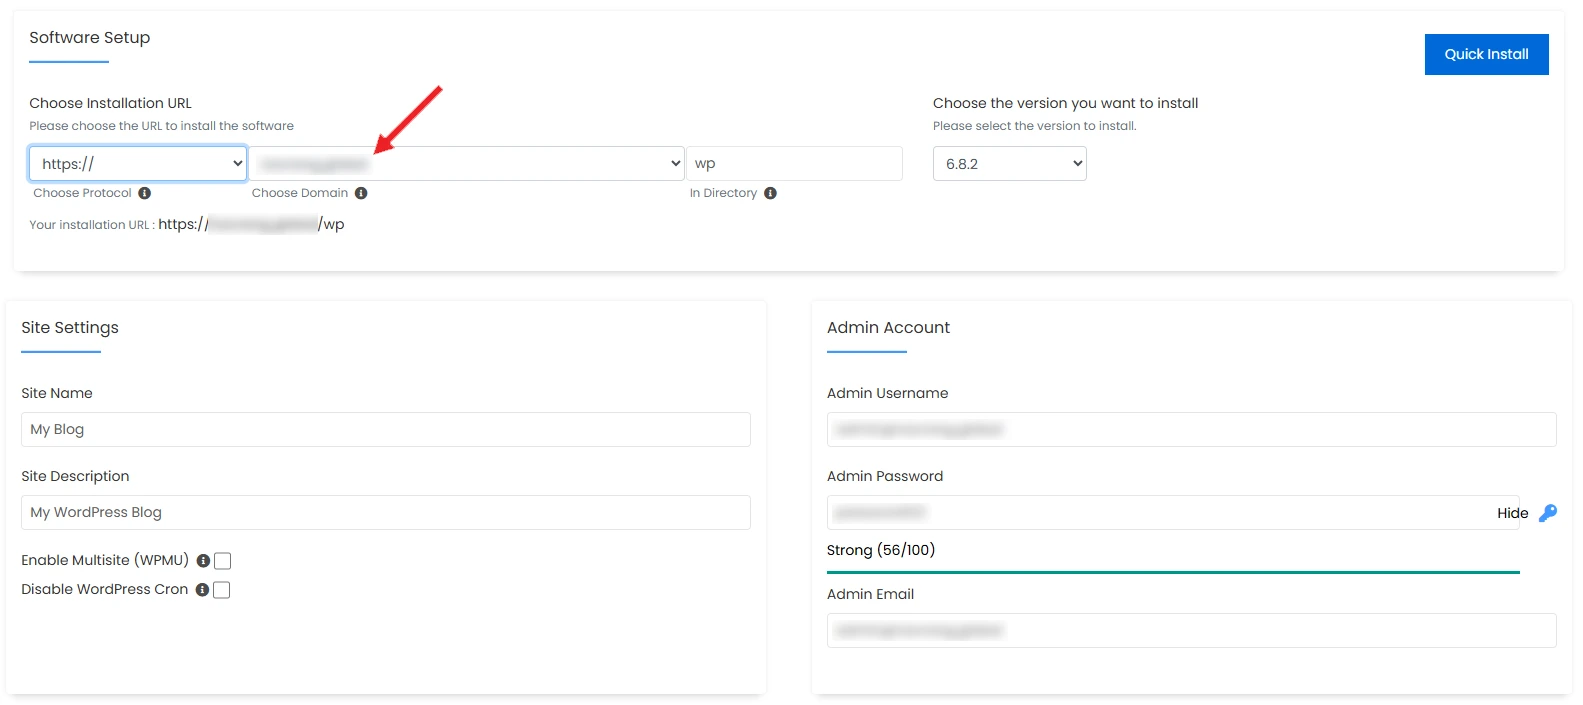
3. Under the Software Setup section, choose the domain and protocol for it eg. https:// or https://www. Make sure to remove the "wp" directory if you want your website URL to be at eg. "https://yourdomain.com" and not "https://yourdomain.com/wp". Select the Wordpress version you want to install. Enter the Site Name and Site Description under the Site Settings. Then under Admin Account section enter the admin username, password and email address.
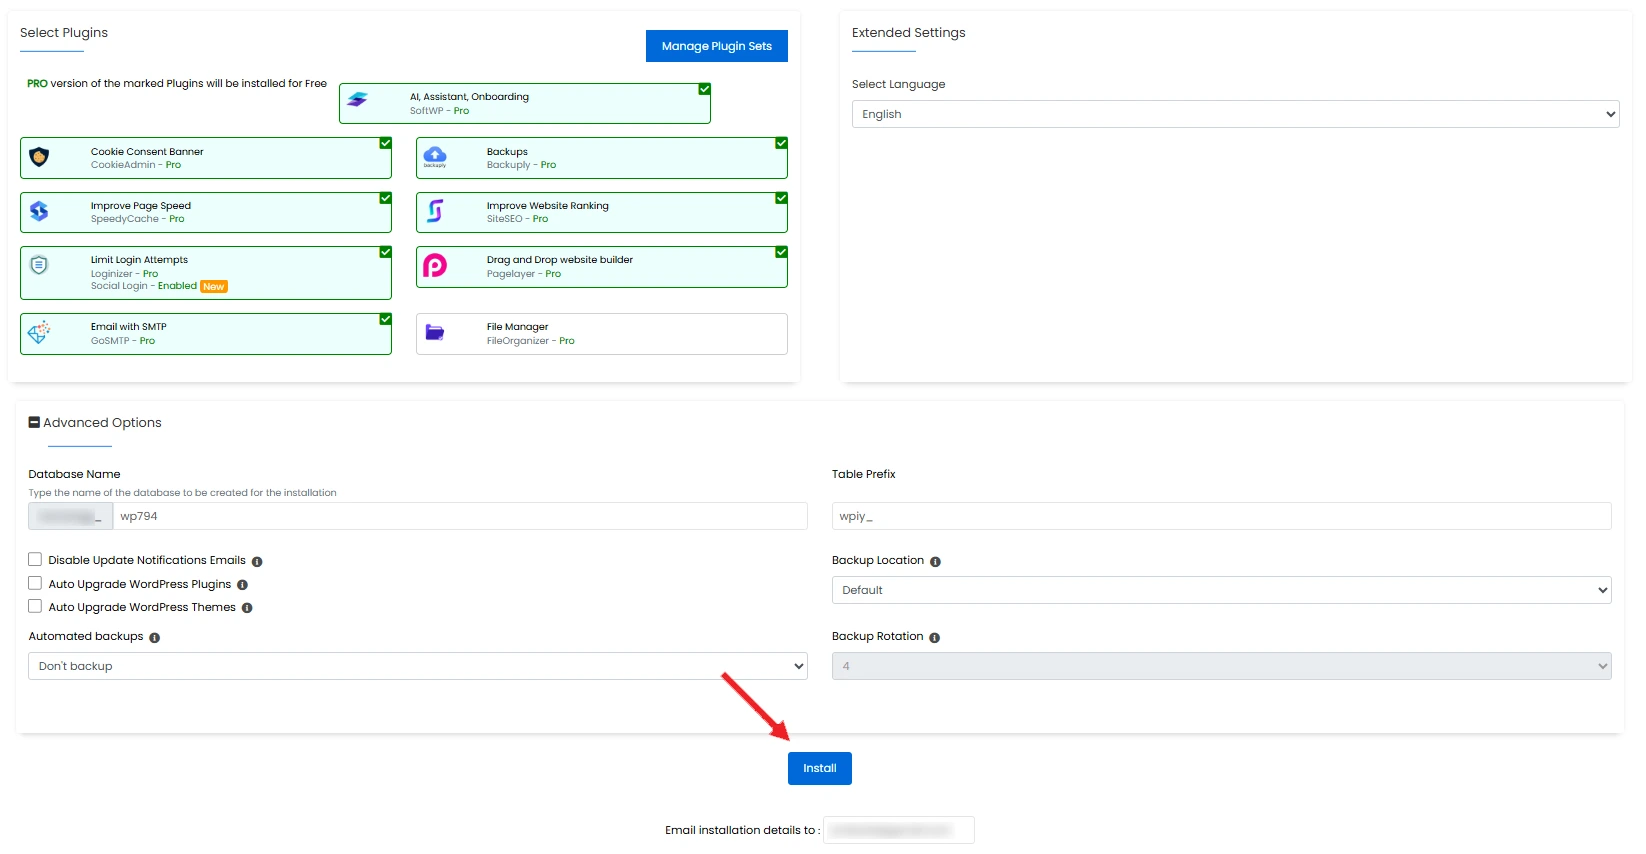
4. Select the plugins you want to install or deselect them if you don't want to. Click on the "+" icon at the "Advanced options" section to expand it. Check the database name and table prefix. Change it if you want or keep it as it is. You can check the rest of the options according to your preference and click on "Install" button.
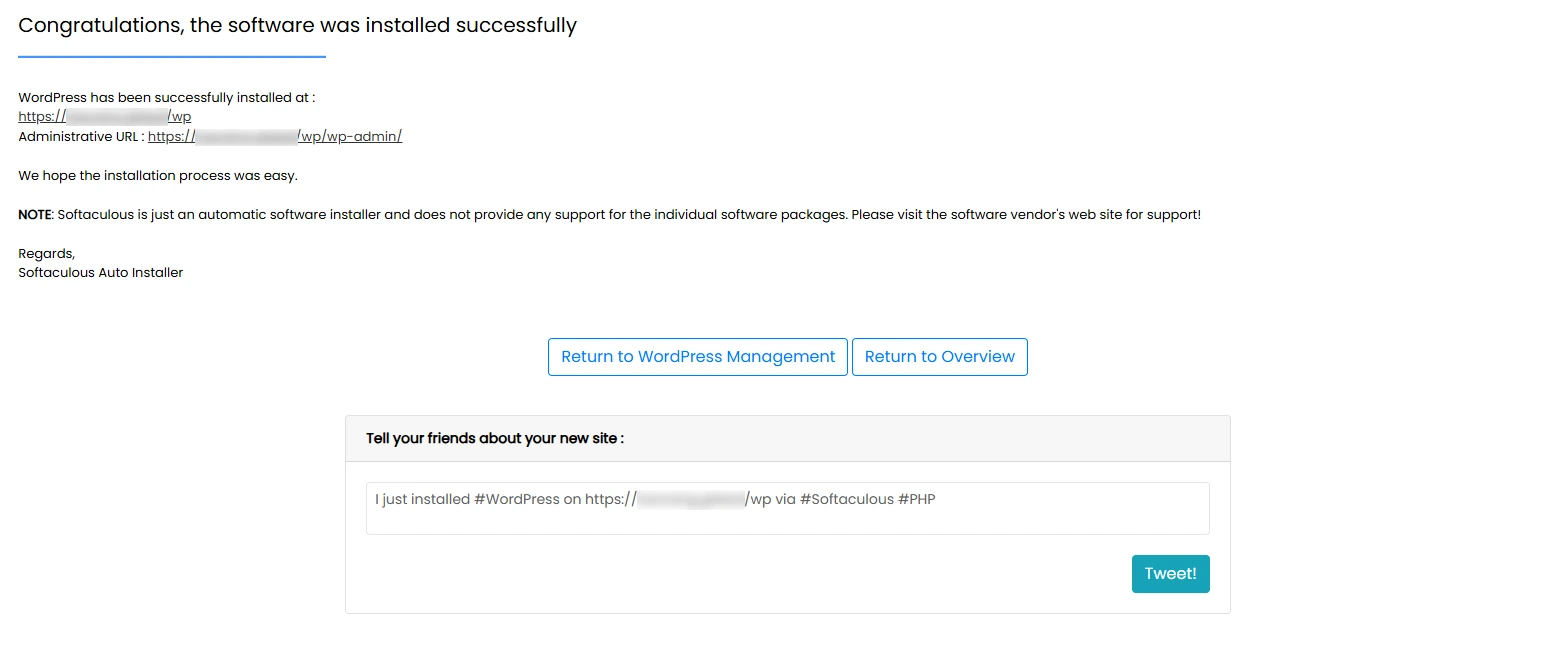
5. Once installed, you will receive confirmation. You can use the admin credentials that you entered earlier at the Administrative URL mentioned (eg. https://yourdomain.com/wp-admin). Click on "Return to Wordpress Management" button.
6. You can see bunch of options for your installed Wordpress website including database details and options to manage plugins, themes and users from here itself.