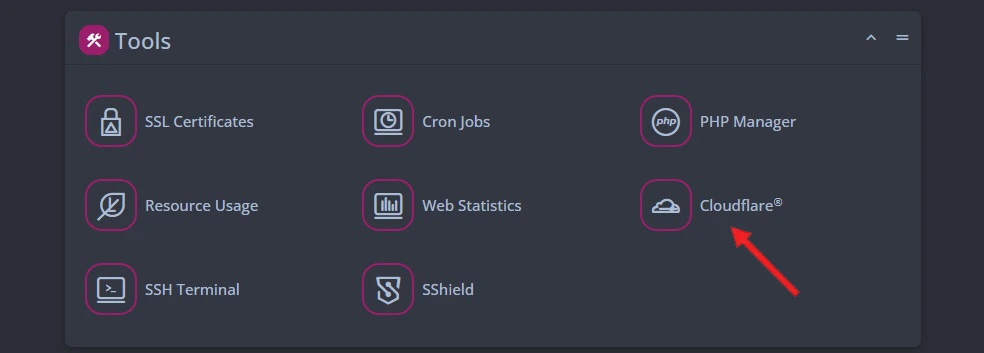
1). Log into the SPanel dashboard. Under the Tools section, you will find the Cloudflare option.
2). Once inside, select the Domain you wish to use with the CDN and click the blue Enable Cloudflare button at the top right.
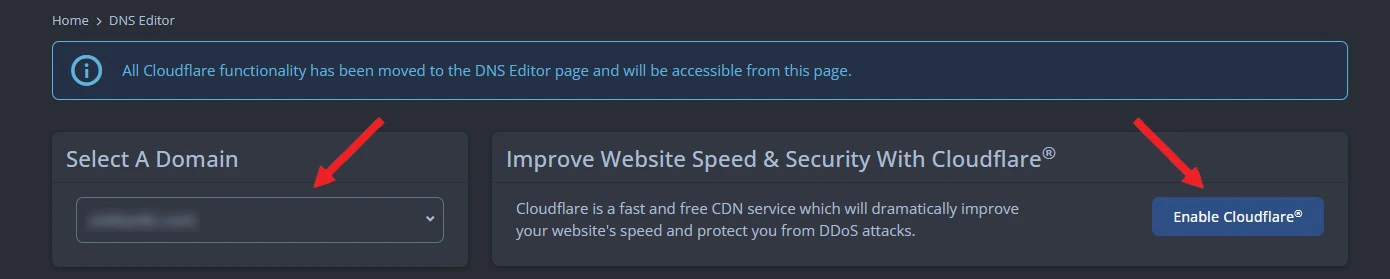
3). You will see a popup with detailed instructions on the settings you need to apply from your Cloudflare account to receive an API token for the integration.
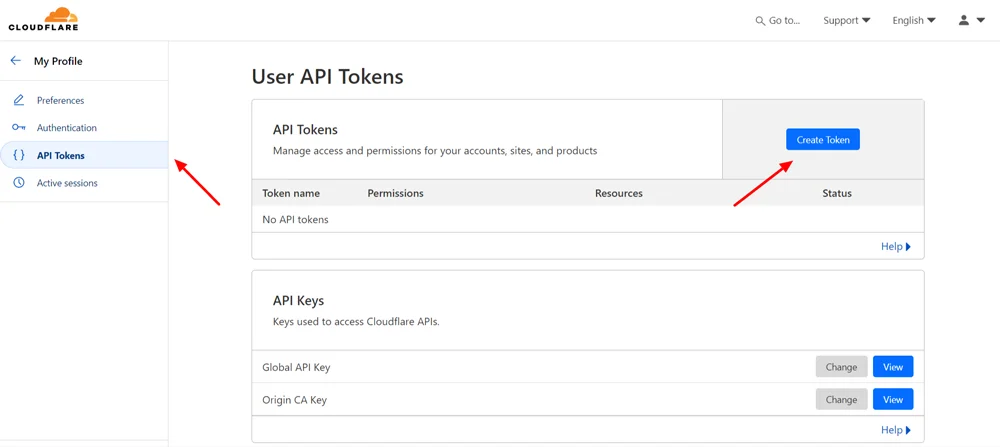
Open a new tab and log into your Cloudflare dashboard. Click the user icon on the top right corner and navigate to My Profile.
On the left, select the API Tokens option. Then, click on the blue Create Token button that will appear. Choose the option Use Template next to Edit Zone DNS.
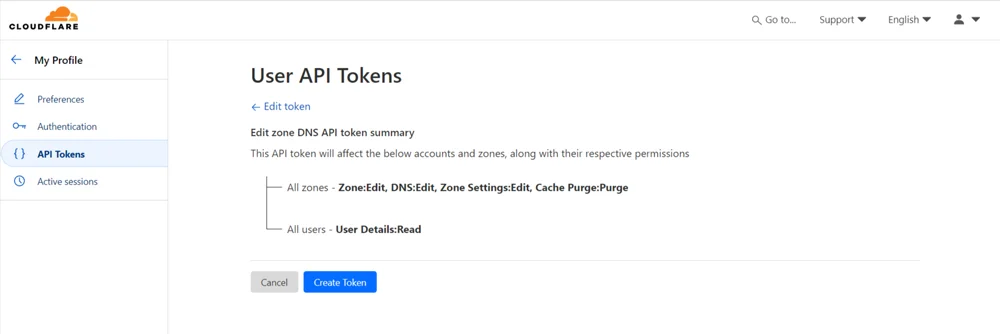
4). On the next page, you need to input the token settings for your DNS zone. Here are the fields you need to add:
- Zone / Zone / Edit
- Zone / DNS / Edit
- Zone / Zone Settings / Edit
- Zone / Cache Purge / Purge
- User / User Details / Read
Note: You only have the first line by default. Click on the +Add More option to add the rest.
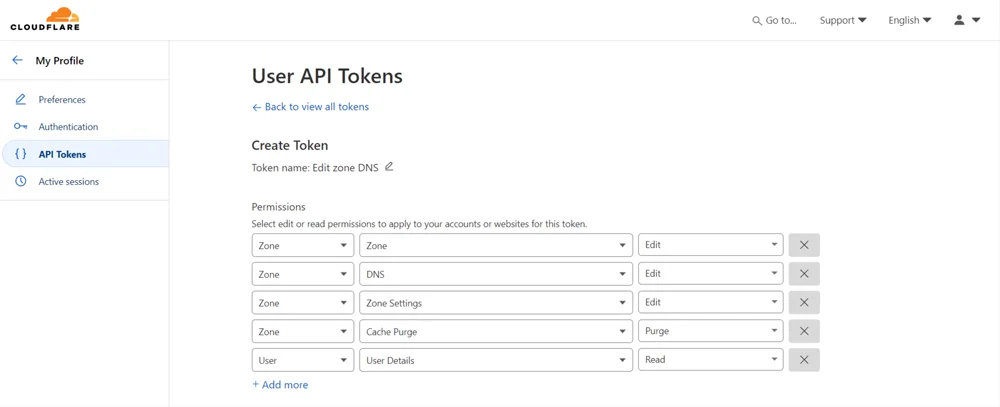
5). Under the Zone Resources section, change the second drop-down from Specific Zone to All Zones. You can leave the rest of the settings as they are.
The next page is a summary of your settings. Double-check if everything was configured correctly. Click on Create Token button.
6). You are now on the last step. The system will configure your API token and give you a code to copy.
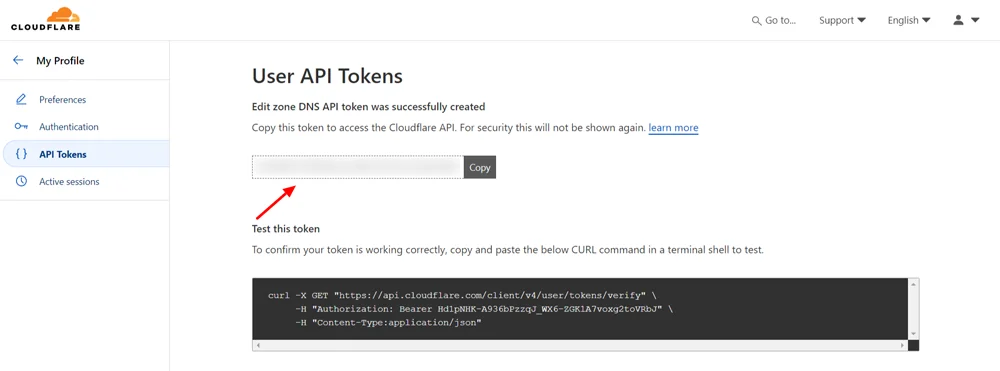
7. Get this code and go back to the tab with your SPanel dashboard. Paste the code at the bottom of the popup page.
You will get a confirmation, and your Cloudflare API Token will be integrated with SPanel.
Once activated, the API token will reveal a bunch of new options in your dashboard including the option to purge the CDN cache of Cloudflare from here itself which allows you to “erase” all previously cached site content in case you want some new changes to be applied immediately. .
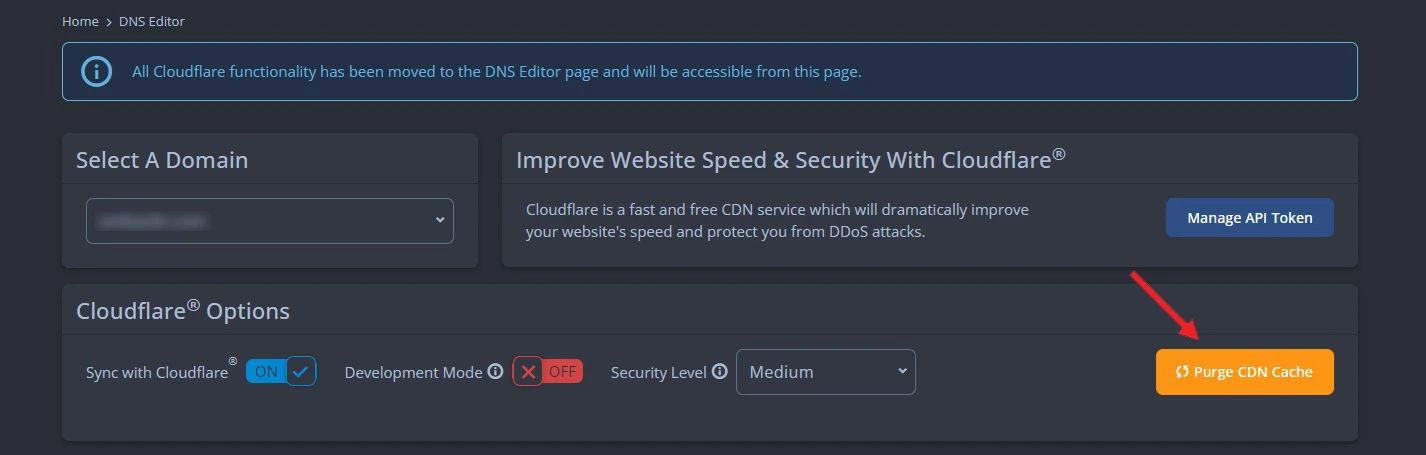
For example, you can choose to deactivate Cloudflare for certain domain names so they only utilize your server DNS. To do so, you can click on the toggle button Sync With Cloudflare.
Another interesting option is the Security Level drop-down menu. It allows you to activate different safety precautions for your website. When you see your site is under attack, there is a special mode called I’m Under Attack, which will filter the traffic to your pages and avoid overloading the server. This is especially useful when you’re under a DDoS attack.
As for the Development Mode, it is a wonderful way to bypass the standard caching and quickly see the results of changes you’ve made on the website.
Moving down the options, you will see a couple of toggles.
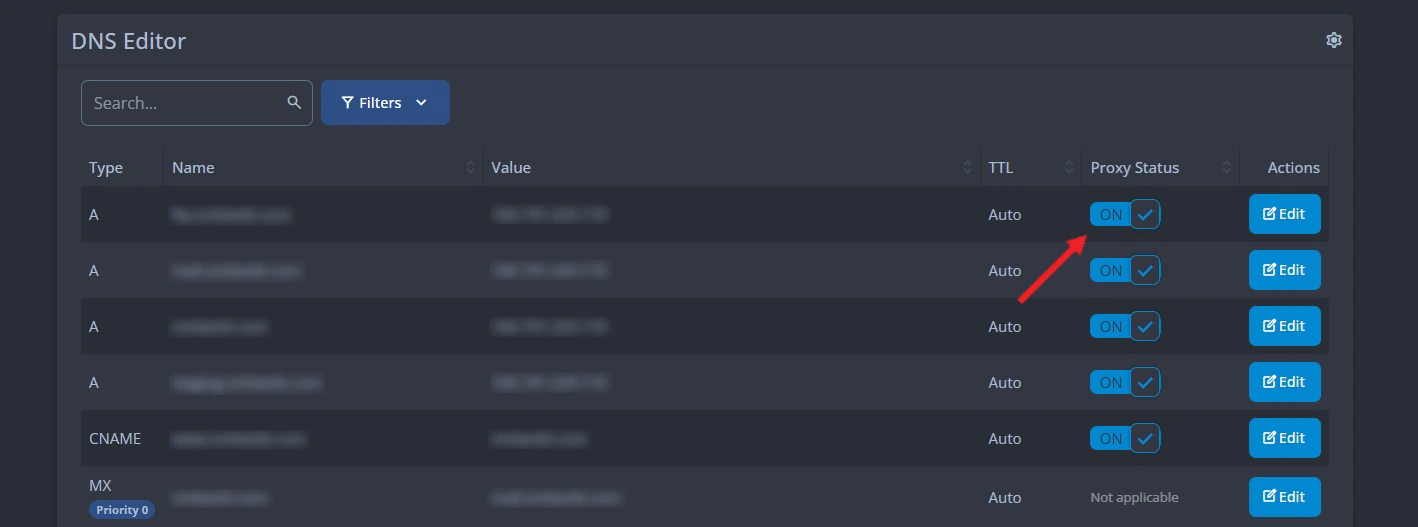
One of the greatest benefits of Cloudflare is the ability to hide the IP address that stands behind your domain. This way, the attackers wouldn’t know which IP to attack. This is achieved through the Proxy Status button, which you can activate with a simple click. When the toggle is switched on, your incoming traffic goes to the Cloudflare servers first before reaching your server destination.
The blue Edit button allows you to manually change any of your records (A, AAAA, CNAME, etc.). Changes are updated immediately, and they take a little propagation time to appear globally.